 how-to
Minimizing Disruption During Foundation Repair
Table of Contents
- Understanding the Foundation Repair Timeline
- Non-Invasive Foundation Repair Methods That Reduce Disruption
- Preparing Home for Foundation Repair: A Room-by-Room Checklist
- Managing Noise, Dust, and Vibration Impact During Construction
- Protecting Pets, Children, and Landscaping During the Work Zone
- Insurance, Liability, and Remote Work Considerations During Disruption
- Post-Repair Cleanup, Air Quality, and Landscaping Restoration
- Conclusion
- Frequently Asked Questions
Last Updated: September 14, 2026
Understanding the Foundation Repair Timeline
Most homeowners assume foundation work means moving out for weeks. Minimizing disruption starts with understanding what actually happens on site, hour by hour.
A typical residential project moves through four phases. Here is the realistic breakdown:
| Phase | Typical Duration | What Happens | Disruption Level |
|---|---|---|---|
| Structural assessment | 1-2 hours | Engineer inspects, maps settlement | Minimal |
| Site preparation | 2-4 hours | Access cleared, interior protected | Low |
| Injection or stabilization work | 1-3 days | Piers driven or resin injected | Moderate |
| Cleanup and verification | 1 day | Debris removed, lift confirmed | Low |
Foundation repair restores a structure's load-bearing capacity by stabilizing the soil beneath it or reinforcing the concrete itself. The method chosen determines how long crews stay.
Most guides treat the timeline as fixed, but in practice it depends on whether the contractor excavates or injects. Most homeowners plan around a two-week excavation that never happens because the soil can often be stabilized through injection ports instead.
Non-Invasive Foundation Repair Methods That Reduce Disruption
Non-invasive foundation repair methods stabilize soil and lift slabs without large-scale excavation, keeping your yard, driveway, and landscaping largely intact. The two dominant approaches are polyurethane resin injection and pier systems installed through small access points.
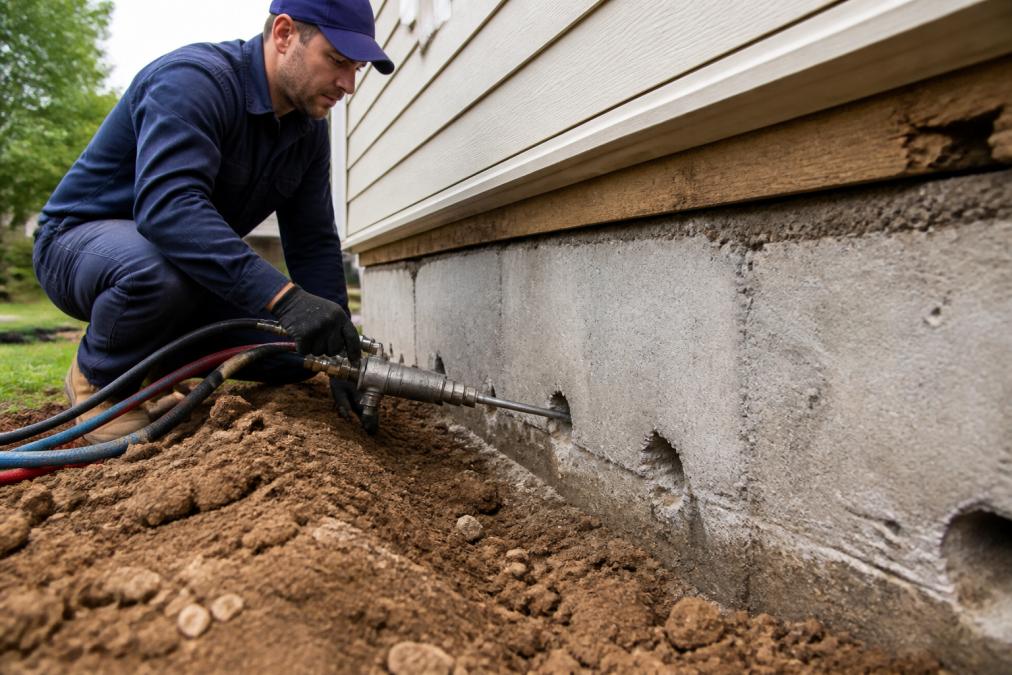
Polyurethane injection works through coin-sized ports. Technicians drill into the slab or soil at intervals, inject expanding resin, and monitor lift in real time. The material fills voids, densifies loose soil, and creates a waterproof barrier as it cures.
Pier and beam systems and underpinning remain valid for deeper load-bearing failures, but they require more site access. Slab jacking sits in the middle: less invasive than full underpinning, more involved than resin injection.
The American Society of Civil Engineers guidance on foundation stabilization notes that method selection should follow a structural assessment, not a sales visit. That distinction matters. A contractor who quotes a method before inspecting the soil is guessing.
What most homeowners never hear: resin injection often finishes in a single day for residential slabs, while excavation-based repairs rarely do.
Preparing Home for Foundation Repair: A Room-by-Room Checklist
Preparing your home for foundation repair is not busywork. Each task exists because of a physical mechanism: vibration travels through framing, dust travels through air returns, and slab movement travels through anything rigid touching the floor.
Budget three to five hours the day before crews arrive. Work from the exterior inward, because access routes and perimeter clearing take the longest.
Exterior and access routes
- Clear potted plants, garden decor, hose reels, and anything fragile from the perimeter
- Move vehicles off the driveway and out of the street-side staging area
- Unlock gates and remove padlocks the crew would otherwise cut
- Trim low branches along the equipment path if they sit below roughly 8 feet
- Mark irrigation heads, buried low-voltage lighting, and septic or gas lines with flags
Living areas
- Move furniture 6 to 8 feet away from exterior walls. Vibration from hydraulic drivers and compactors travels laterally through the slab and can walk furniture into walls.
- Take wall-mounted art, mirrors, and televisions off exterior walls. Drywall anchors fail under sustained vibration more often than a single impact.
- Roll up area rugs and store them in an interior room. Dust settles into pile and is hard to extract later.
Kitchen
- Empty lower cabinets along affected walls. Drilling and injection ports are often placed at the slab edge inside the cabinet footprint.
- Unplug appliances on circuits that may be isolated, and photograph the breaker panel before anything is switched.
- Move the refrigerator only if the crew asks; moving a modern refrigerator unnecessarily risks floor damage.
Bathrooms
- Remove items from under-sink cabinets on exterior walls
- Check for existing leaks and photograph them. A pre-existing drip is easy to blame on the crew later, and a photo protects both sides.
- Confirm the toilet is secure. A loose toilet plus slab movement equals a wax ring failure.
Bedrooms and closets
- Clear closets on exterior walls. Crews may need to drill through the slab inside the closet footprint.
- Move beds away from the work zone, and strip and bag bedding if dust is a concern.
- Remove items from the top shelves of exterior-wall closets. Vibration shakes loose objects off shelves.
Garage
- Clear the slab entirely; the garage is often the primary access point for equipment and injection rigs.
- Move anything stored on wall hooks above the slab.
- If the water heater or HVAC unit sits on the garage slab, confirm whether it needs disconnecting.
Documentation workflow
Photograph every room before work begins: one wide shot per room, one close-up of any existing crack, and one shot inside each cabinet you emptied. Date-stamp the photos if your phone allows it. This baseline is what you will rely on if you file an insurance claim or dispute damage later.
Once prep is done, walk the property with the crew lead before equipment arrives. Fifteen minutes aligning on access routes, protected zones, and shutdown procedures prevents most day-two friction.
Managing Noise, Dust, and Vibration Impact During Construction
Noise, dust, and vibration are the disruption factors homeowners notice most, and each has a specific control mechanism. Injection work produces far less of all three than excavation, but no foundation project is silent.
Dust control
Dust mitigation is a containment problem, not a cleaning problem. The standard approach is 6-mil poly sheeting taped over doorways and air returns, plus negative air pressure that pulls air out of the contained area. Ask three questions before work starts:
- How will interior access points be sealed?
- Will a negative air machine run during drilling and injection?
- What is the plan for the HVAC return nearest the work zone?
If the contractor cannot answer all three, that is a warning sign. A common shortcut is taping plastic over doorways without sealing the return, which pulls dust into the ductwork for weeks.
Vibration control
Vibration impact depends on equipment. Hydraulic drivers and compactors generate sustained vibration that travels through the slab and into framing; injection rigs generate very little. If your project involves driving, plan for the following:
Schedule Structural Evaluation →
- Move wall-mounted art, mirrors, televisions, and shelving off exterior walls
- Secure or relocate aquariums; sloshing water amplifies stress on seams and livestock
- Move musical instruments, especially strings and pianos, away from exterior walls
- Check that ceiling fans and light fixtures on exterior-wall circuits are tight
A useful rule of thumb: anything you would not want shaken for six hours should not be on an exterior wall during driving work.
Noise management
Noise is the hardest factor to eliminate. Most drilling and driving happens during standard working hours, typically 8 a.m. to 5 p.m., and the loudest phase is usually the first day. Plan calls and meetings around that window.
According to Occupational Safety and Health Administration guidance on construction noise, prolonged exposure above 85 decibels risks hearing damage. That threshold is a useful reference point even though it is written for workers, not residents. A hydraulic driver at close range can exceed it. Crews wear protection. If you plan to stay nearby during driving work, hearing protection is a reasonable precaution, and noise-canceling headphones are not a substitute for actual hearing protection.
Documentation before and after
Photograph exterior walls, ceilings, and floors before work starts, noting existing cracks, paint seams, and tile grout lines. Then photograph the same locations within 24 hours of completion. This before-and-after pair is the most useful evidence if a vibration-related crack appears later.
If your contractor proposes driving work without discussing containment or vibration protection, ask why. The answer tells you more about the crew than any review.
Protecting Pets, Children, and Landscaping During the Work Zone
Pets, children, and landscaping all need one thing before equipment rolls in: physical separation from the work zone.
Set up a designated safe area inside the home, ideally a room far from the work zone with water, toys, and a familiar scent. For pets, this reduces stress and prevents bolting through an open door.
For landscaping, the sequence matters:
- Photograph beds, shrubs, and irrigation lines before work starts
- Mark sprinkler heads and buried lines with flags
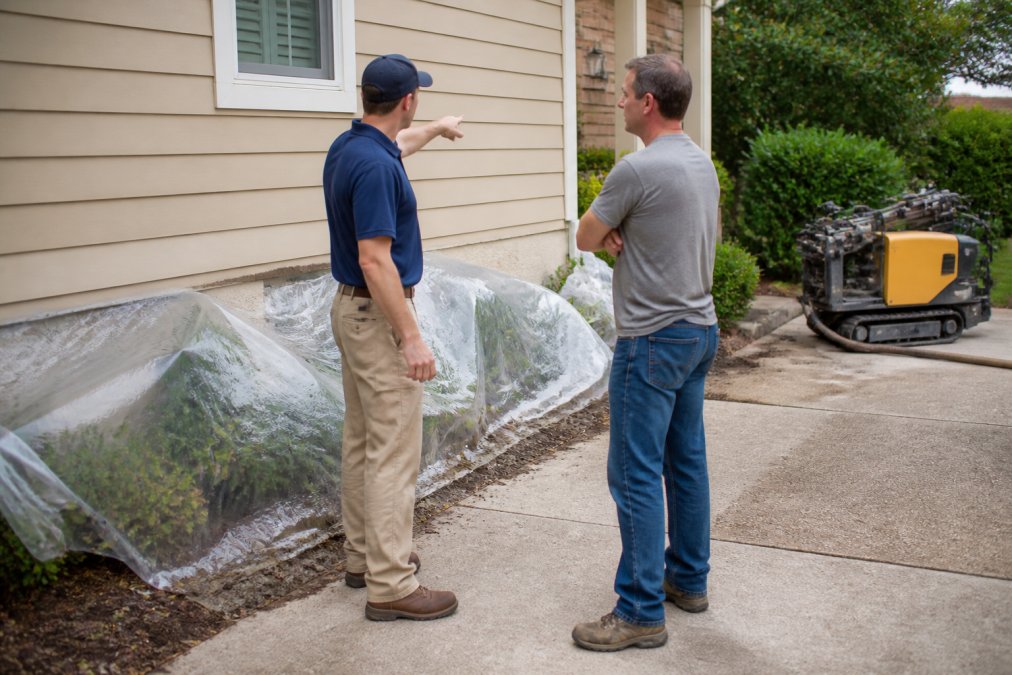
- Ask the crew to lay plywood or mats over turf along access routes
- Confirm which plants will be temporarily relocated
Landscaping restoration is often included in a good contract, but only if damage is documented beforehand. Verbal promises do not survive a change in crew.
Insurance, Liability, and Remote Work Considerations During Disruption
Insurance and liability questions come up before almost every project, and the answers depend on your policy and your contractor's coverage. Ask for a certificate of insurance before work begins listing general liability and workers' compensation.
Most homeowner policies cover sudden damage from a covered peril but exclude long-term settlement and soil movement. Read your exclusions before assuming a claim will be approved. If your policy includes sinkhole coverage, confirm the deductible, often a percentage of the dwelling limit rather than a flat amount.
Liability during the work itself sits with the contractor, provided they are licensed and insured. Verify the license number with your state's licensing board, and keep a copy of the certificate on file.
Remote work changes the calculus. If you work from home, plan for two to three days of intermittent noise and periodic power interruptions. Options:
- Book a coworking day pass for the heaviest work days
- Set up a temporary workspace in the room farthest from the work zone
- Notify your team in advance and shift meetings to the afternoon
- Use noise-canceling headphones and a backup hotspot for connectivity
The Insurance Information Institute's guidance on homeowner policies recommends reviewing your coverage before any major structural work, not after.
Post-Repair Cleanup, Air Quality, and Landscaping Restoration
Cleanup and air quality are the final phase, and they matter more than most homeowners expect. Fine dust settles for days after work ends, and injection work can leave faint odors without ventilation.
Run this sequence after the crew leaves:
- Ventilate every affected room for at least 24 hours
- Wipe hard surfaces with a damp cloth, not a dry one
- Vacuum with a HEPA filter, then replace the filter
- Wash curtains, bedding, and any soft furnishings near the work zone
- Run your HVAC system with a fresh filter for 48 hours
Landscaping restoration usually follows within a week. Turf recovers quickly when protected with mats; beds may need fresh mulch and light watering to re-establish.
If you notice a persistent chemical smell or lingering dust after 72 hours, call your contractor. Do not assume it will fade.
Conclusion
Foundation repair asks a lot from a homeowner: patience with noise, tolerance for a disrupted routine, and trust in a process you cannot fully see. The right contractor makes that easier by choosing methods that stabilize soil with minimal excavation.
Florida Foundation Repair specializes in non-excavative polyurethane injection engineered for the state's karst geology, backed by a limited lifetime warranty and licensed, insured crews (CGC# 1526152). We offer free emergency structural evaluations and restore load-bearing capacity without tearing up your property. Schedule a structural evaluation with Florida Foundation Repair and get a clear plan before the first drill touches your slab.
Frequently Asked Questions
Can you live in a house while foundation repair is done?
In most cases, yes. Non-invasive methods like polyurethane injection do not require you to vacate the property. You may need to avoid specific work zones for a few hours at a time, but the home remains livable. If your contractor uses heavy excavation or underpinning, you might need to relocate temporarily. Ask your structural engineer for a clear answer based on your foundation repair timeline and the method chosen.
What are the most common reasons for foundation failure?
In Florida, the leading causes are soil moisture changes, soil expansion and contraction, and karst geology that creates sinkhole risks. Poor drainage, leaking pipes, and lack of preventative maintenance also contribute. When soil loses load-bearing capacity, settlement and bowed walls appear. A structural assessment can identify whether your foundation repair should focus on soil stabilization, concrete reinforcement, or drainage improvements like a French drain or sump pump.
How do I protect my landscaping during foundation work?
Before work begins, mark irrigation lines and move potted plants. Contractors should use plywood or plastic sheeting to cover garden beds near the work zone. Non-invasive foundation repair methods, such as polyurethane injection, require only small access holes, so excavation damage is minimal. After the job, landscaping restoration usually involves re-seeding or replacing mulch. Ask your contractor for a site preparation plan that includes landscaping protection.
Are there non-invasive foundation repair methods that actually work?
Yes. Polyurethane injection is a proven non-invasive foundation repair method. It stabilizes soil without large excavation, restores load-bearing capacity, and creates a waterproof barrier. This approach works well for slab jacking, void filling, and lifting settled concrete. It is especially suited to Florida's karst geology because it addresses soil moisture control and reduces the risk of future sinkhole formation. A licensed structural engineer can confirm if it fits your situation.