 how-to
How to Stabilize Sandy Soil Under Your House
Table of Contents
- Step 1: Recognize Foundation Settlement Signs in Sandy Soil
- Step 2: Get a Geotechnical Site Assessment Before You Stabilize Sandy Soil
- Step 3: Improve Soil Bearing Capacity Improvement Through Compaction and Engineered Fill
- Step 4: Choose Between Polyurethane Injection and Helical Piers
- Step 5: Control Drainage and Hydrostatic Pressure to Protect Your Foundation
- Step 6: Understand Polyurethane Soil Injection Cost and Other Stabilization Costs
- Step 7: Know When to DIY and When to Call a Professional
- Conclusion: Your Roadmap to Stabilized Sandy Soil
- Frequently Asked Questions
Last Updated: September 23, 2026
Step 1: Recognize Foundation Settlement Signs in Sandy Soil
Foundation settlement signs show up fast in sandy soil because sand shifts the moment water moves through it.
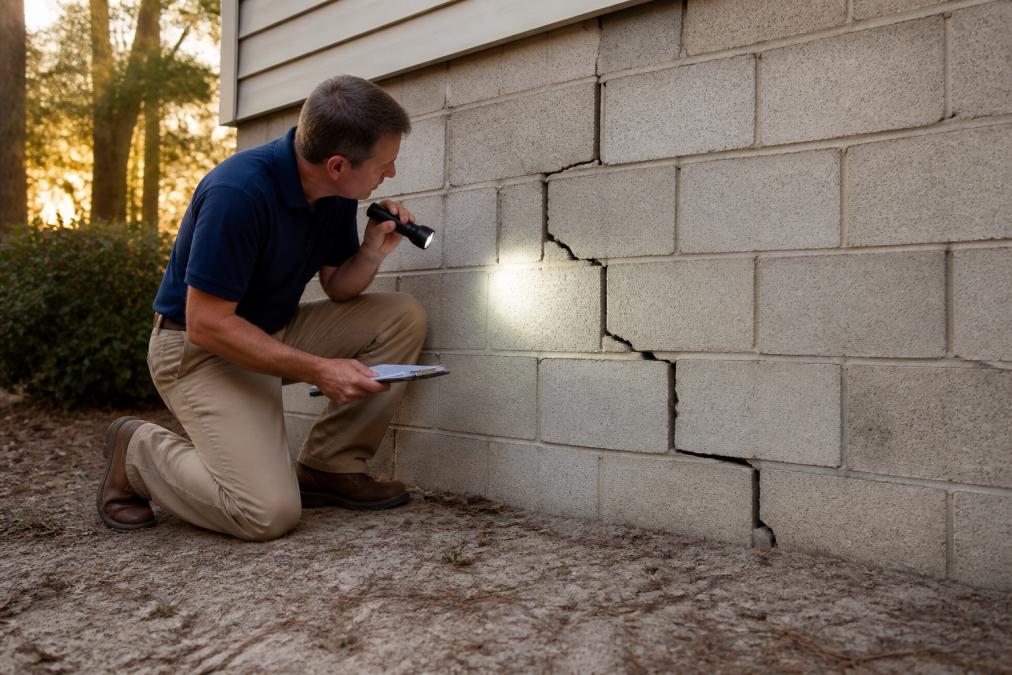
Cracks, Sticking Doors, and Sloping Floors
Watch for these warning signs:
- Diagonal cracks near door and window corners
- Doors and windows that stick or won't latch
- Floors that slope toward one side of the house
- Gaps between the wall and ceiling trim
- Cracks in brick mortar that zigzag down the wall
The FEMA guide to foundation cracks and settlement explains how these patterns point to soil movement below.
How Sandy Soil Loses Load-Bearing Capacity
Sandy soil holds a house up through friction between grains. Add water and that friction drops: the soil erodes, voids open, and the foundation loses support. That's why load-bearing capacity and moisture content are linked in every site assessment.
Step 2: Get a Geotechnical Site Assessment Before You Stabilize Sandy Soil
A geotechnical site assessment evaluates your soil's density, moisture content, and permeability before any repair begins, telling you what's actually happening below the surface.
A licensed structural engineer or geotechnical firm will:
- Dig test borings to sample soil at depth
- Measure soil density and moisture content
- Check for voids and erosion channels
- Map the water table and drainage patterns
- Recommend a stabilization method
Step 3: Improve Soil Bearing Capacity Improvement Through Compaction and Engineered Fill
Soil bearing capacity improvement starts with compaction. Compaction grouting pumps a stiff mortar mix into the soil at low pressure, filling voids and pushing loose sand grains together.
Compaction Grouting and Engineered Fill for Sandy Sites
| Method | How It Works | Best For | Disruption |
|---|---|---|---|
| Compaction grouting | Injects stiff mortar to fill voids | Existing foundations | Low |
| Engineered fill | Replaces weak soil with compacted material | New builds, additions | High |
| Chemical grouting | Binds loose sand grains | Permeable sandy sites | Low |
Chemical grouting uses a liquid that sets and locks sand grains in place, ideal where sand is loose and water moves freely.
Step 4: Choose Between Polyurethane Injection and Helical Piers
Polyurethane foam injection is the least invasive option for most sandy sites. Helical piers suit deeper, heavier settlement. The right pick depends on void size, soil depth, and load.
How Polyurethane Foam Injection Works in Sandy Soil
Crews drill small holes through the slab. They pump expanding foam into the soil. The foam fills voids, lifts the slab, and creates a waterproof barrier. No digging. No heavy equipment on your lawn.
When Helical Piers and Foundation Underpinning Make More Sense
Helical piers screw into deep, stable soil and transfer the load down; foundation underpinning does the same with concrete or push piers.
Choose piers when:
- Settlement is deep and ongoing
- The soil near the surface can't be fixed
- The structure carries heavy loads
Step 5: Control Drainage and Hydrostatic Pressure to Protect Your Foundation
Drainage systems decide whether your repair lasts. Water caused the problem, and if you don't control it, it comes back.
Fix drainage with these steps:
- Grade soil so it slopes away from the house
- Extend downspouts at least 5 feet from the foundation
- Install French drains or a curtain drain uphill
- Add a sump pump if the water table is high
- Check retaining walls for cracks and weep holes
Step 6: Understand Polyurethane Soil Injection Cost and Other Stabilization Costs
Most guides on sandy soil stabilization skip the money question or bury it in a "contact us for a quote" line, leaving homeowners unable to tell a $2,000 drainage fix from a $40,000 underpinning job. Here's the relative cost picture so you can plan, budget, and compare bids on equal terms.
Schedule Structural Evaluation →
Relative Cost Tiers by Method
Costs scale with how deep the problem goes and how much equipment has to reach it. Ranked from least to most expensive, most practitioners place the methods this way:
| Method | Relative Cost | Typical Trigger |
|---|---|---|
| Surface drainage and regrading | Lowest | Water pooling near the foundation, no structural movement yet |
| Chemical grouting | Low to moderate | Loose, permeable sand with shallow voids |
| Polyurethane foam injection | Moderate | Slab voids, minor settlement, need for minimal disruption |
| Engineered fill replacement | Moderate to high | New construction, additions, shallow weak layers |
| Compaction grouting | High | Existing foundation with deep voids and ongoing settlement |
| Helical piers and underpinning | Highest | Deep, active settlement that surface methods cannot arrest |
What Actually Drives the Invoice
These line items move a stabilization quote's total:
- Number of injection points or piers. Foam and grout are priced per point; piers are priced per unit installed. A larger footprint means more points.
- Depth to competent soil. Piers must reach load-bearing strata. The deeper that layer sits, the more steel and labor the job consumes.
- Volume of material. Foam and grout are sold by volume. Large voids consume more product, and product is often the single biggest line item.
- Site access. A foundation wall reachable by truck and hose is cheaper to treat than one behind a fence, a deck, or mature landscaping.
- Engineering and permitting. A stamped report, a permit, and any required inspections add cost before a single hole is drilled.
- Drainage work. If the quote does not include drainage correction, add it separately. A repair without drainage control is a repair you will pay for twice.
How to Compare Two Quotes Fairly
Two bids for the same house can differ by thousands and still both be "correct", they may solve different problems. To compare them, ask each contractor to put the following in writing:
- The number and spacing of injection points or piers
- The depth each point or pier is designed to reach
- The volume and type of material specified
- Whether drainage correction is included, and if so, what it covers
- The engineering basis for the recommendation
- Warranty terms, including what voids the warranty
Where the Money Is Best Spent First
If your budget is limited, spend in this order: drainage first, diagnosis second, structural repair third. Drainage correction is the cheapest intervention and protects every dollar you spend afterward. A geotechnical assessment costs far less than a foundation repair and tells you whether you need one at all. Only then commit to grouting, foam, or piers.
Step 7: Know When to DIY and When to Call a Professional
Most guides dodge this question, because the honest answer isn't "always hire a pro" or "you can handle it", it's a threshold. Below it, you can manage the problem yourself with drainage work. Above it, every DIY dollar is wasted on a symptom while the cause keeps moving.
Tier 1: You Can Handle This Yourself
These are surface-water problems: cheap to fix, safe to attempt, and they prevent the conditions that cause settlement in the first place.
- Regrading soil around the foundation. Soil should slope away from the house at roughly a 6-inch drop over the first 10 feet. If it slopes toward the house, fix it.
- Extending downspouts. Discharge should land at least 5 feet from the foundation. Splash blocks alone are not enough on sandy soil.
- Clearing gutters and downspouts. A clogged gutter dumps water directly at the foundation line.
- Sealing cosmetic cracks. Hairline cracks in stucco or paint that show no displacement can be sealed and monitored.
- Documenting. Photograph cracks with a date and a ruler in frame. This is free, and it is the single most useful thing you can do before calling anyone.
Tier 2: Get a Professional Assessment Before You Spend Anything
These symptoms mean the problem has moved below the slab. You may not need structural repair yet, but you need a diagnosis to know.
- Diagonal or stair-step cracks in brick, block, or foundation walls
- Doors or windows that stick in one season and free up in another
- Floors that slope measurably across a room
- Gaps between trim and wall, or between the wall and ceiling
- Cracks that are widening when you compare photos month over month
Tier 3: Stop and Call a Licensed Structural Engineer
Here DIY isn't just ineffective, it can mask a problem that's actively worsening.
- Cracks wider than a quarter inch, or any crack you can fit a coin into
- Visible foundation displacement, where one side of a crack sits higher than the other
- Sinkhole indicators: depressions in the yard, circular cracks, or a foundation that appears to be dropping suddenly
- Doors or windows that no longer operate at all
- Any movement that continues after drainage has been corrected
The Decision Rule
Use this single test: if the symptom is above ground and water-related, you can usually handle it. If the symptom is in the structure itself, or if it is getting worse after you fixed the water, you need a licensed structural engineer.
Conclusion: Your Roadmap to Stabilized Sandy Soil
Sandy soil under a house is a moving target. It shifts with every wet season. Catching settlement early, getting a real site assessment, and choosing the right method keeps your foundation level.
Frequently Asked Questions
What are the signs of foundation settlement in sandy soil?
Look for diagonal cracks in interior walls or exterior brick, doors and windows that stick or won't latch, sloping floors, and gaps around window frames. In sandy soil, these signs often appear after heavy rain or drought because the soil shifts quickly. Foundation settlement signs also include cracks in the slab or foundation wall, especially near corners. If you notice any of these, a professional evaluation can confirm whether the soil under your house has lost load-bearing capacity.
Can you harden sandy soil under an existing foundation?
Yes. Two common methods are compaction grouting and polyurethane foam injection. Compaction grouting pumps a stiff mortar-like mix into the soil to densify it, while polyurethane injection expands to fill voids and lift the foundation. Both improve soil bearing capacity improvement without major excavation. The right choice depends on your soil's density, moisture content, and the severity of settlement. A geotechnical engineer can test your soil and recommend the best approach.
How does polyurethane injection work for sandy soil stabilization?
Polyurethane injection involves drilling small holes through the foundation slab and injecting a two-part resin that expands rapidly. In sandy soil, the foam fills voids, compacts loose sand, and creates a waterproof barrier. The expansion lifts the foundation back toward level. This method is fast, minimally invasive, and works well in sandy conditions where traditional mudjacking may fail. It also adds load-bearing capacity and reduces future settlement risk.
What is the best way to improve soil bearing capacity for a house?
The best method depends on your site. For sandy soil, compaction grouting and polyurethane injection are often effective because they densify the soil and fill voids. Helical piers may be needed if the soil is too loose near the surface. A geotechnical engineer will test soil density and moisture content to recommend the right solution. Improving bearing capacity also involves managing drainage to prevent erosion and hydrostatic pressure from undoing the work.