 comparison
Seawall Soil Stabilization vs Standard Repair: 2026 Guide
Table of Contents
- Seawall Soil Stabilization vs Standard Repair: Key Differences at a Glance
- Signs of Seawall Failure You Shouldn't Ignore
- How Polyurethane Injection for Seawalls Works
- Standard Repair Methods: When They Work and When They Don't
- Seawall Repair Cost Estimate: What Drives the Price
- DIY vs. Professional Assessment: Permitting and Regulatory Requirements
- Environmental Impact of Repair Materials
- Conclusion: Choosing the Right Approach for Your Seawall
- Frequently Asked Questions
Last Updated: September 20, 2026
Seawall Soil Stabilization vs Standard Repair: Key Differences at a Glance
Seawall soil stabilization is the practice of injecting expanding structural material into the soil behind a seawall to restore load-bearing capacity and stop erosion at its source. Standard repair patches the wall itself. This distinction matters more than most waterfront owners realize, and it is the difference between fixing a symptom and fixing the cause.
Here is the core comparison:
| Factor | Soil Stabilization | Standard Repair |
|---|---|---|
| What it fixes | Soil voids, erosion, hydrostatic pressure | Cracks, joint leaks, surface damage |
| Method | Polyurethane or permeation grouting | Crack injection, patching, cap replacement |
| Disruption | Minimal, no excavation | Moderate to heavy |
| Addresses root cause | Yes | Rarely |
| Longevity | Long-term with warranty | Variable |
| Best for | Active erosion, settlement, seepage | Cosmetic or isolated damage |
Signs of Seawall Failure You Shouldn't Ignore
The clearest warning signs of seawall failure are soil loss behind the wall, visible cracks wider than a quarter inch, sinkholes forming near the cap, and water seeping through joints at low tide. Any one of these signals that the structure is losing its battle with hydrostatic pressure.
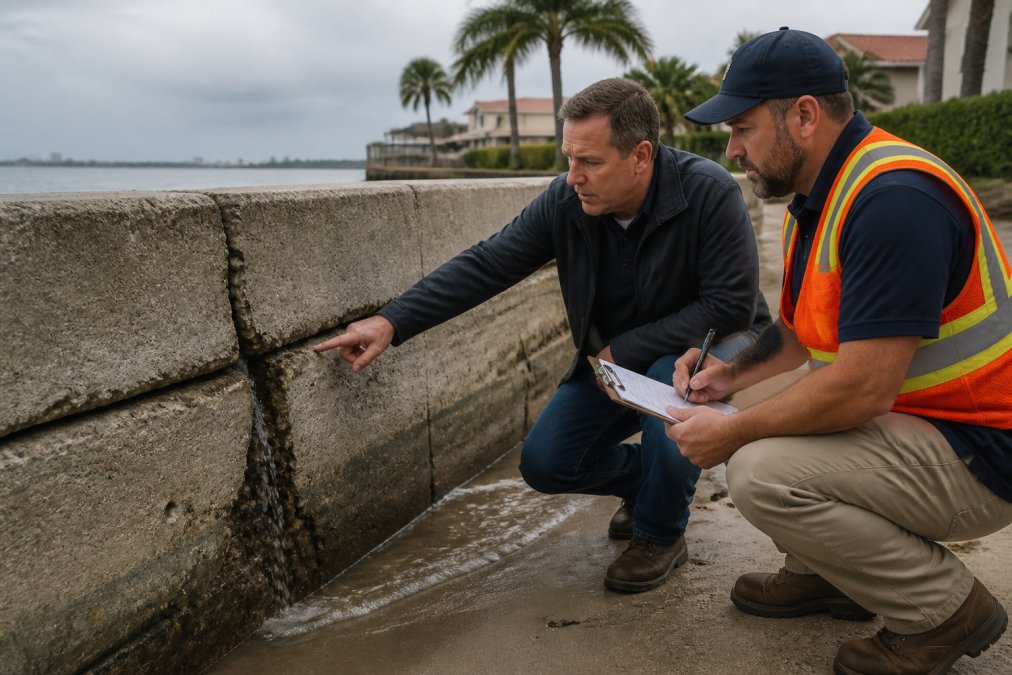
Watch for these indicators:
- Soil settlement behind the wall, creating a dip in the lawn
- Joint leaks that worsen after heavy rain
- Tilting or rotation of the wall face toward the water
- Sinkholes or soft spots near the seawall cap
- Riprap displacement at the base
- Corrosion of tiebacks or reinforcement anchors
How Polyurethane Injection for Seawalls Works
Polyurethane injection for seawalls works by pumping expanding structural foam through small ports drilled into the soil behind the wall. The material fills voids, compacts loose soil, and lifts settled sections, all without excavation.
The process typically follows these steps:
- Assessment: A technician maps voids and weak zones
- Port placement: Small injection points are drilled through the wall or cap
- Injection: Expanding foam is pumped into the subsurface
- Consolidation: The material compacts surrounding soil and fills voids
- Verification: Lift and density are confirmed on site
Standard Repair Methods: When They Work and When They Don't
Standard repair methods work well for isolated, surface-level damage and fail when the underlying soil has already shifted. Crack injection, joint sealing, and cap replacement all have a place, but only when the wall's structural integrity is otherwise sound.
These methods include:
- Crack injection for narrow, non-structural fissures
- Joint sealing to stop water infiltration at panel connections
- Seawall cap replacement for deteriorated concrete tops
- Riprap addition to reduce wave energy at the base
- Tieback and anchor installation for lateral reinforcement
Seawall Repair Cost Estimate: What Drives the Price
A seawall repair cost estimate depends on wall length in linear feet, damage severity, access conditions, and whether soil stabilization is included. Quotes for the same wall can differ widely because they may be addressing different problems, one might be pricing a surface patch, while another prices a subsurface fix.
The main cost drivers:
- Linear footage of the affected wall, most residential seawalls run 50 to 200 linear feet, and every method scales with that number
- Depth and volume of soil voids, a shallow void near the cap is a fraction of the material cost of a deep void running the full wall height
- Access for equipment along the shoreline, a wall reachable by truck-mounted rig is cheaper than one requiring a barge or hand-carry equipment across a lawn
- Permitting fees required by local authorities, these vary widely by jurisdiction and by whether the work touches navigable waters
- Method chosen, stabilization versus partial repair versus full replacement
| Cost Component | Soil Stabilization | Standard Repair |
|---|---|---|
| Mobilization and setup | Low, small rig, no excavation | Moderate to high, equipment and debris hauling |
| Subsurface assessment | Included (void mapping, density testing) | Often excluded |
| Material | Polyurethane or permeation grout, measured in gallons | Patch, sealant, or cap concrete, measured in bags or yards |
| Labor duration | Usually one to two days for a residential wall | Days to weeks depending on scope |
| Restoration | Minimal, small injection ports patched | Landscaping, sod, and cap finishing often required |
| Permitting | Frequently required | Frequently required |
| Warranty | Often long-term or limited lifetime | Typically short-term |
A few patterns worth knowing before you collect bids:
- Quotes that skip the subsurface assessment are guesses. If a contractor prices the job from a visual walk-around alone, they cannot know whether the soil behind the wall is intact. That quote will change once work begins.
- The cheapest bid is often the most expensive outcome. A patch that fails within a season means paying twice, once for the patch, once for the stabilization you should have done first.
- Replacement is the ceiling, not the default. Full wall replacement is the highest-cost option and the most disruptive. Stabilization exists specifically to avoid it when the wall structure itself is still sound.
- Permit fees are separate from contractor pricing. Ask whether the quote includes permit application and any required environmental review, or whether those are billed separately.
DIY vs. Professional Assessment: Permitting and Regulatory Requirements
Professional assessment is the right call for any seawall showing structural symptoms, because permitting and regulatory requirements make DIY work risky and often illegal. Most coastal jurisdictions require permits for seawall repair and shoreline work, and the permit process is the single most underestimated part of a seawall project.
The permit pathway, step by step
A typical seawall repair or stabilization project moves through several layers of review:
Schedule Structural Evaluation →
- Local building department, issues the construction or repair permit and inspects the finished work. This is almost always the first stop.
- State environmental agency, reviews shoreline construction under state coastal or environmental statutes. Requirements and thresholds vary by state.
- Army Corps of Engineers, under Section 10 of the Rivers and Harbors Act and Section 404 of the Clean Water Act, a permit is generally required for work in, over, or affecting navigable waters of the United States. The U.S. Army Corps of Engineers regulatory program publishes the application process and the nationwide permits that cover some smaller activities.
- Environmental review, larger or more sensitive projects may trigger additional review for materials placed in or near waterways.
DIY vs. professional: a decision checklist
A homeowner can do more assessment than most guides admit, and less than they think. Here is how to sort cosmetic from catastrophic before you call anyone.
You can safely document (no permit needed):
- Photograph cracks, joint leaks, and staining, with a tape measure in frame for scale
- Note where the lawn dips or where water pools after rain
- Record when seepage appears, at low tide, after storms, or constantly
- Mark the waterline against the wall over several weeks to spot movement
Call a professional immediately if you see:
- Cracks wider than a quarter inch, or cracks that have widened since you last looked
- The wall face tilting or rotating toward the water
- Sinkholes or soft, spongy ground near the cap
- Soil visibly escaping through joints or under the wall at low tide
- Riprap at the base displaced or missing
- Rust staining that suggests tieback or reinforcement corrosion
Do not attempt yourself, under any circumstances:
- Excavation behind or in front of the wall
- Any work below the mean high water line
- Adding or replacing riprap, fill, or structural material
- Drilling injection ports or performing any grouting
Environmental Impact of Repair Materials
The environmental impact of repair materials is a factor most guides skip entirely. Polyurethane grouts are generally considered inert once cured and are used in controlled volumes, while cement-based grouts require far more material and heavier equipment.
Key considerations:
- Volume of material introduced to the subsurface
- Curing behavior and whether leaching occurs
- Equipment footprint along the shoreline
- Sediment disturbance during installation
- Long-term stability of the injected material
Conclusion: Choosing the Right Approach for Your Seawall
The deciding question is simple: is the soil behind your wall still doing its job? If voids, seepage, or settlement say no, stabilization is the answer. If the damage is truly cosmetic and isolated, standard repair can hold.
Frequently Asked Questions
How much does it cost to repair a seawall?
Costs vary widely based on damage extent, wall length, and method. Standard repairs like crack injection, full replacement, and soil stabilization with polyurethane injection each have different cost considerations. For a precise seawall repair cost estimate, schedule a professional evaluation.
What are the limitations of soil stabilization?
Soil stabilization works best for early-stage erosion, void filling, and restoring load-bearing capacity. It may not be suitable for walls with severe structural failure, such as large cracks or leaning. In those cases, standard repair or replacement is necessary. A geotechnical assessment determines if stabilization can address the issue or if more extensive work is needed.
What is the average lifespan of a seawall?
A well-maintained seawall can last 25 to 50 years, depending on materials and environmental conditions. Concrete walls in marine environments face corrosion and hydrostatic pressure, which shorten lifespan. Regular inspections and timely repairs, including soil stabilization, can extend it significantly. Polyurethane injection helps prevent soil loss that accelerates deterioration.
What is the best material to backfill a seawall?
The best backfill material depends on the wall type and soil conditions. Crushed stone or gravel is common for drainage, but it can shift over time. Polyurethane injection is an alternative that fills voids and stabilizes soil without excavation. It expands to compact loose soil, creating a waterproof barrier that reduces hydrostatic pressure and prevents future erosion.
How do I know if my seawall needs soil stabilization or structural repair?
Look for signs like cracks, joint leaks, sinkholes, or leaning. If the wall is structurally sound but soil is eroding, stabilization is appropriate. If the wall itself is damaged, standard repair or replacement is needed. A professional assessment evaluates structural integrity and soil density to recommend the right solution. Polyurethane injection can address both soil and minor structural issues.